Looking for wiring harness diagram for ignition coils / p301

DIYguy

Member
Joined
Jun 8, 2024
Posts
51
Location
FL
My 2005 Isuzu Ascender drove fine 5mi this morning to a store and started up an hour later to come home but idled rough. As I drove home I had the CEL (and later after a few cycles doing a few initial checks the code eventually went from p300 to p301….

When I took off the resonator to get to the coils, I found this wire frayed on the harness that goes to the coils wiring harness (fray is on the “non coil side).
Does anyone have a wiring diagram or know what this wire is connected to?IMG_2645.pngIMG_2635.jpeg

It’s the “top left” wire looking front to back
I think it is yellow with striped?
 
My 2005 Isuzu Ascender drove fine 5mi this morning to a store and started up an hour later to come home but idled rough. As I drove home I had the CEL (and later after a few cycles doing a few initial checks the code eventually went from p300 to p301….

When I took off the resonator to get to the coils, I found this wire frayed on the harness that goes to the coils wiring harness (fray is on the “non coil side).
Does anyone have a wiring diagram or know what this wire is connected to?View attachment 117437View attachment 117438

It’s the “top left” wire looking front to back
I think it is yellow with striped?

At a quick of-the-cuff guess, without verifying anything.... I'm going to say that may be the injector(s) harness connector.
 
  • Like
Reactions: DIYguy
Thanks Azswiss and TJ!

TJ, you are right, the wire in my photo definitely is the yellow with black that is Injector 6, also confirmed as it is position D in connector 104.

The wire looks intact and since my only code is only p301, I’m going to use some liquid electrical tape to repair the insulation and move on to checking the coil pack on #1. (In case of future cyl 6 problem I will revisit that wire though).
 
You will need to deal with CAUSE as well as the OUTCOME here. This damage is emblematic of Mouse Depredation. The repairs and clean up deserve special attention as the North American Deer Mouse is the likely Culprit and thus as a carrier of the Dreaded HANTA Virus... USE NO COMPRESSED AIR when cleaning around these areas.

The Infection occurs largely from contact with infected materials entering the Eyes, Nose and Mouth and from direct inhalation of Dust Particles containing Dried Urine, Saliva and Feces made friable and airborne inside of the Lungs.


Use Wet Napkins soaked in Bleach Water while wearing Wrap-Around Eye Protection, M11 Nitrile Gloves and a tight-fitting N-95 Face and Nose Mask or a Painter's Respirator. The Virus is carried in the Feces, Dried Urine and by direct Bites. Signs of Nesting and the Tear Down of the Hood Liner may be present. Bag these materials and spray Lysol all around the Engine Compartment for the sake of safety.

SIGNSOFMOUSEDEPREDATION.jpg

Mortality from an HPS (Hantavirus Pulmonary Syndrome) in North America is nearly 40% and there are NO efficacious treatments... so take these suggestions to heart whenever cleaning up, performing repairs and replacements or manually accessing such locations.


"If there is ANY Chance of getting Infected with HANTA... Do NOT FAFO..." -=mrrsm=-
 

Attachments

Last edited:
Update: it looks like a valve cover gasket leak. See photos below, everyone likes pictures! 😃

Misfire was a p301 so I took plug 1 out and also plug 2 out to compare. Photos below of each cylinder are numbered. (I just happened to take the photo of 2 after the plug was out). I couldn’t get the light right in the back to focus on 5, 6 so there are 2 photos of each.

1. I am going to tighten the valve cover bolts (to 89in-lb) to see if that is enough. Thinking the gasket might just have slightly shrunk, less pliable after 20yrs.
2. Will replace just plug #1 for now (plugs are 60k old)

Also, does anyone have advice on whether I could also apply a bit of high temp RTV in the coil pack holes, just along the seam from the valve cover to the block (where the individual cylinder gaskets would be)?
 

Attachments

  • IMG_2670.jpeg
    IMG_2670.jpeg
    499 KB · Views: 1
  • IMG_2669.jpeg
    IMG_2669.jpeg
    451.5 KB · Views: 1
  • IMG_2667.jpeg
    IMG_2667.jpeg
    492.6 KB · Views: 1
  • IMG_2665.jpeg
    IMG_2665.jpeg
    532.4 KB · Views: 1
  • IMG_2664.jpeg
    IMG_2664.jpeg
    529.6 KB · Views: 1
  • IMG_2660.jpeg
    IMG_2660.jpeg
    423.5 KB · Views: 1
  • IMG_2659.jpeg
    IMG_2659.jpeg
    468.5 KB · Views: 1
  • IMG_2662.jpeg
    IMG_2662.jpeg
    642.5 KB · Views: 1
  • IMG_2671.jpeg
    IMG_2671.jpeg
    497.3 KB · Views: 1
  • Like
Reactions: mrrsm
Thanks for making that connection... I have such an over-riding concern for our Membership (and Lurkers, too) about the concentrated risk this issue represents. It is odd that we never think to "Wash Our hands" AFTER we Eat if we are going to "Work Under The Hood" on our Cars, SUVs and Trucks... but the slightest odor of FOOD left on anything around the Engine Compartment can get these Rodents VERY interested.

FWIW... Placing Corn Husk Fabric Packets soaked in Peppermint Oil in and around the locations you found the Damage will seriously discourage their presence, as the Chemicals in that Plant substance blocks the most important Sense of Smell that they rely upon to find Food. You can get them HERE:


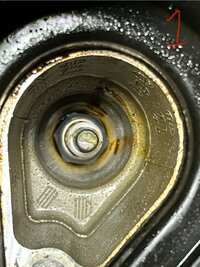
As far as using the Silicone around the "Hard Sponge Rubber" Grommets surrounding the Base of the COPs...you might want to avoid that. In many cases... what passes by and collects down in the Spark Plug Wells may be due to having a Leaking Cowl Seal between the Hood and the Firewall that allows Heavy Rain Water to invade the Upper Engine that needs addressing. It is the Inner Well Rubber "O" Ring Style Grommet that is the culprit as they all flatten out over time and need replacing as a complete set (NOT a Trivial R&R, by the way).

There are quite a few GMT Nation Threads discussing "Misfires due to Rain Water" worth viewing on this issue with more advice on eliminating the problem.

PS Unless you have already looked things over... The EFI Harness can suffer the same fate with Rodent Depredation ...so give that a close look, too.

Speaking of Harnesses... eBay has a REALLY Good Deal on an entire Rear Lift Gate Electrical Harness for around $22.00,,,OBO,,,HERE:

 
Last edited:
Final result… bad coil pack (not that surprised).

I moved coil pack #2 into #1 and put a used junkyard coil pack into #2. Running fine now. Put 350 miles on since and running strong.

Thanks again all for the earlier assistance.
 
  • Like
Reactions: mrrsm and TJBaker57
For the leaking plug well gaskets, pull the coil bolts out (they can be unscrewed from the coil) and add a washer under each bolt head. This will add a little more squeeze to the valve cover gasket that has flattened out.
 
  • Like
Reactions: mrrsm
Thanks, that is a good idea!

Do you have any tricks for accessing/tightening the 3 valve cover bolts that are under the plenum by the fuel rail without taking it all apart?
 
Nope. Those are only accessible if you remove the intake manifold.
 
  • Like
Reactions: mrrsm and DIYguy

Forum Statistics

Threads
24,251
Posts
648,422
Members
20,690
Latest member
SAM1265

Members Online